Contents
- What is AmneziaWG, and how does it differ from WireGuard?
- VPS requirements for this installation
- Step 1. Prepare your server and network access
- Step 2. Open the AmneziaWG wizard in the Proksik service
- Step 3. Enter the server IPv4 and SSH details
- Step 4. Choose a UDP port and number of profiles
- Step 5. Review the plan and confirm installation
- Step 6. Download a profile and connect a device
- Step 7. Verify the IP, websites and both networks
- Troubleshooting AmneziaWG connections
- AmneziaWG or VLESS + WebSocket + TLS?
- Frequently asked setup questions
To set up AmneziaWG on your own server, you need an Ubuntu VPS, root access and an accessible UDP port. The Proksik service’s wizard takes your server details, shows an installation plan and produces a separate connection profile for each device. This setup does not require a domain or a TLS certificate.
This guide covers the path from preparing a VPS to connecting a phone or computer. It describes AmneziaWG 3.1 as installed by the Proksik service. Screenshots show the Russian interface at proksik.su on 16 November 2026. The address 203.0.113.10 is for documentation only: enter your own VPS IPv4 instead.
What is AmneziaWG, and how does it differ from WireGuard?
AmneziaWG adds traffic obfuscation to a WireGuard-based protocol. It changes recognisable packet characteristics to make the protocol harder to identify. Encryption protects content; obfuscation changes how the connection looks. See the official AmneziaWG documentation for technical details.
Your device needs an application compatible with AmneziaWG 3.1. The standard WireGuard application cannot use the profile described here. Obfuscation also cannot guarantee that a VPN works on every network: AmneziaWG uses UDP, which an ISP or hosting provider may restrict.
VPS requirements for this installation
- Ubuntu 22.04 or 24.04 LTS, amd64. These are the platforms supported by the installer in the Proksik service.
- A public IPv4 assigned to the VPS network interface. An internal-only address or an unsuitable NAT setup does not meet this installation's requirements.
- Root SSH access. Have the server IP, SSH port and access details ready for the protected installation form.
- At least 512 MB total RAM, 256 MB available RAM and 512 MB free disk space. These are installer admission thresholds, not a throughput guarantee.
- A working TUN device and an accessible UDP port. The default port is UDP 51820.
Use a separate VPS without conflicting VPN services or routes. The installer uses 10.203.0.0/24, so that subnet must not conflict with existing networking. A dedicated test environment is preferable to adding your first VPN to a server running important applications.
Step 1. Prepare your server and network access
Install a supported Ubuntu version in your hosting panel and note the public IPv4. Confirm that you can connect over SSH. Its default TCP port is 22; if you changed it, enter the actual management port in the wizard.
Allow incoming UDP on the selected AmneziaWG port in the hosting firewall. Opening TCP 51820 does not open UDP 51820. The Ubuntu firewall and your hosting panel firewall are separate layers, and both must permit the connection.
You do not need to register a domain, create a DNS record, choose an SNI or issue a certificate. For a broader introduction, see our guide to running your own VPN.
Step 2. Open the AmneziaWG wizard in the Proksik service
Visit the AmneziaWG page in the Proksik service and open setup, or go directly to the configuration wizard. Select “VPN AmneziaWG” at the service stage.
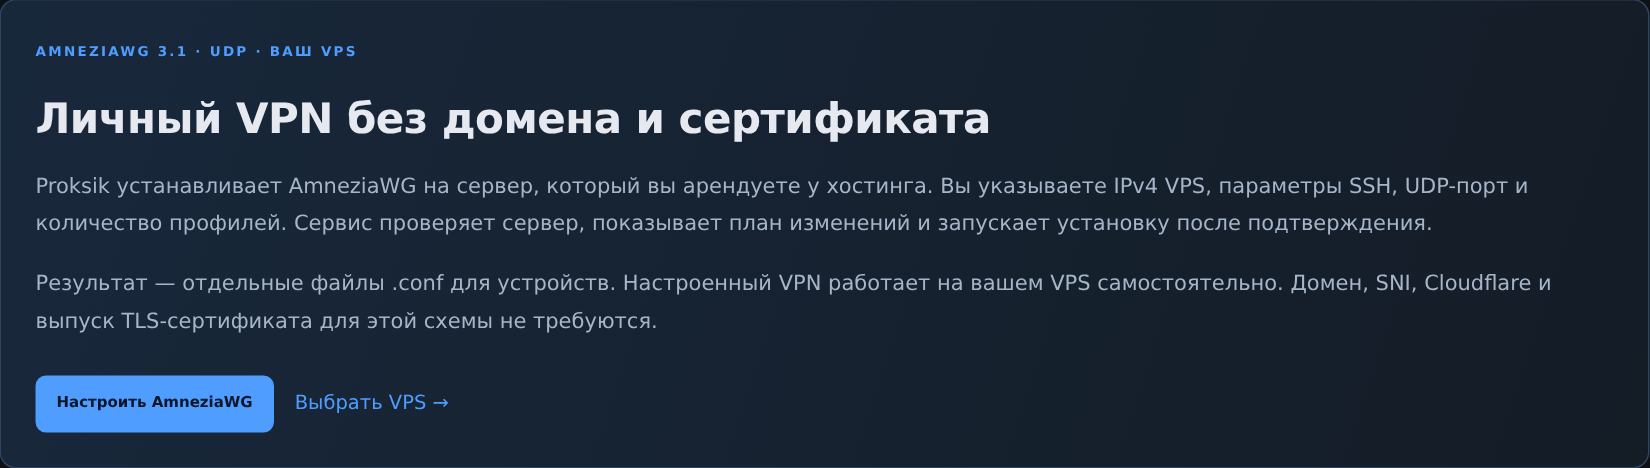
The wizard has five stages: Service, VPS, Parameters, Plan and Result. First enter server details and configuration parameters. Opening the wizard does not install anything on the VPS.
Step 3. Enter the server IPv4 and SSH details
At the VPS stage, enter:
- Plan name: an optional label such as “Personal VPN”. Never put passwords or keys in this field.
- Public VPS IPv4: the address shown in your hosting panel.
- SSH port: usually 22. This is the management port, not the VPN port.
- SSH user: this installer requires
root.
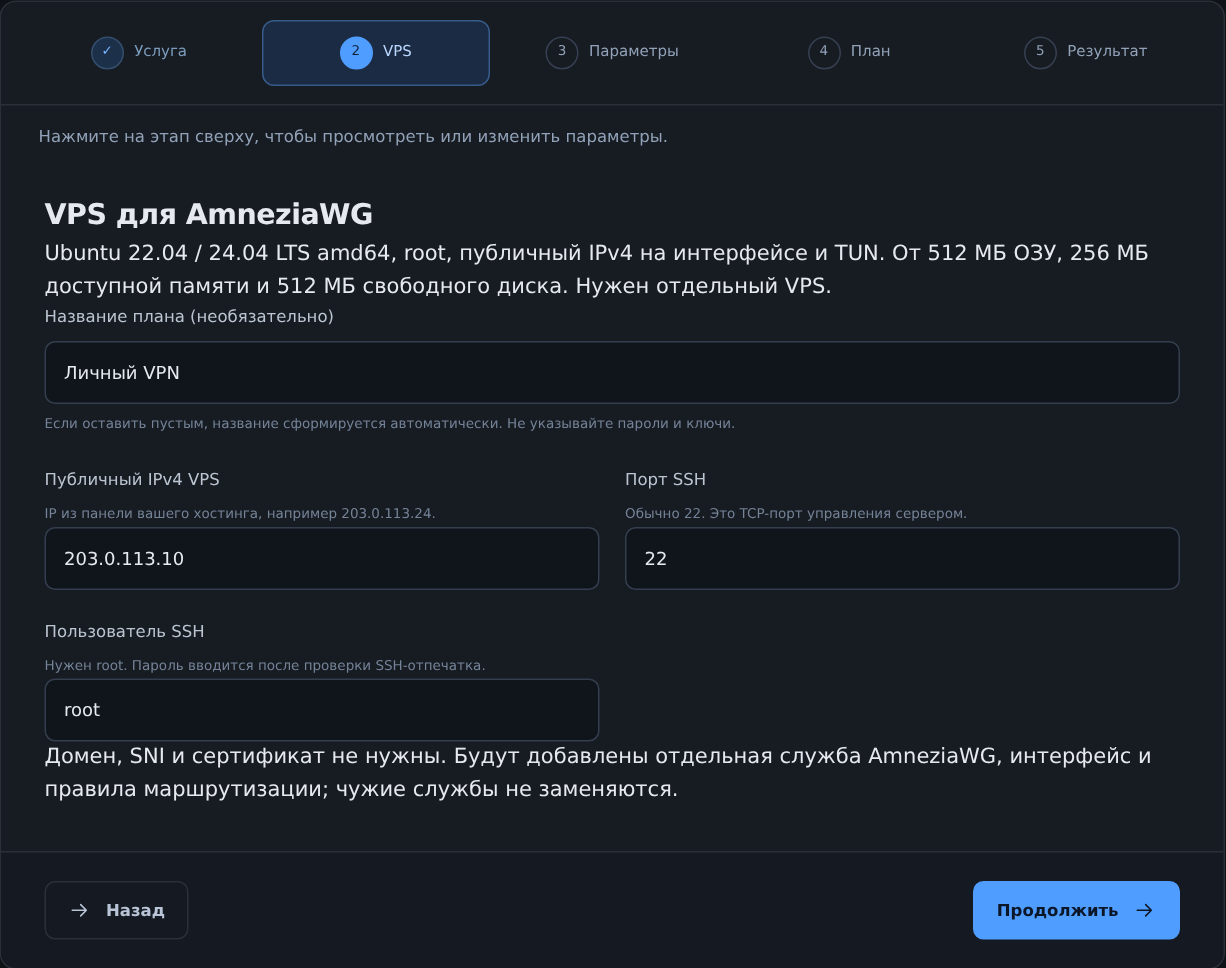
Keep the two port settings distinct: the Proksik service uses IPv4 plus the TCP SSH port for administration; your devices use IPv4 plus the AmneziaWG UDP port for the VPN.
Step 4. Choose a UDP port and number of profiles
The Parameters stage supports 1–10 profiles. Choose two for a phone and laptop: the installer creates separate keys and .conf files. Use a different profile on each device, particularly for simultaneous connections.
The default UDP port is 51820, with an accepted range of 1024–65535. Make sure it is available and permitted in the hosting firewall. TCP 443 is not required for this installation.
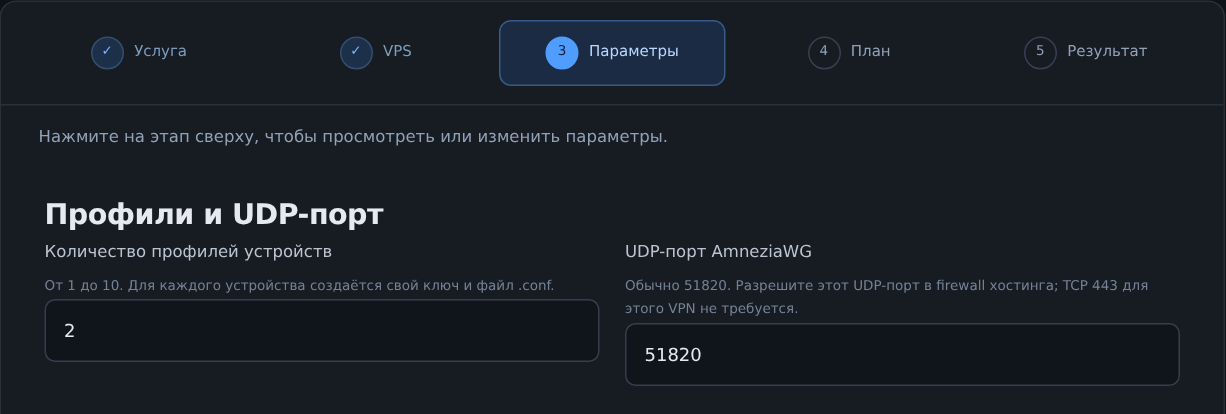
Plan these values in advance. Reapplying the same configuration preserves the keys. In the current implementation of the Proksik service, changing the port or profile count after installation requires a separate VPS. Reinstallation is not a general-purpose way to alter these settings.
Step 5. Review the plan and confirm installation
Complete the CAPTCHA if displayed, then generate the plan. Sign in to the Proksik service to save and run the installation. Check the IP, AmneziaWG service, UDP port and profile count before confirming.
Proceed to installation through your account. Verify the server's SSH fingerprint and provide access through the protected form. The installer checks the OS, available resources, TUN, the port and existing configuration. Resolve reported conflicts before approving changes.
After confirmation, the Proksik service installs AmneziaWG-Go and adds its service, interface and routing rules. This installation does not require Docker, a kernel replacement or compiling software on the VPS.
Wait for the verification result. The Proksik service checks more than whether the service is running: an independent client establishes a tunnel and sends an HTTPS request through it. If a step fails, read its error before repeating the installation.
Step 6. Download a profile and connect a device
Download a .conf for one profile, or a ZIP for several profiles. Extract the archive and give each device its own file. Per-profile QR codes are another option if your application supports importing by camera.
Install a current client that supports AmneziaWG 3.1. The official application list links Android, Windows, iOS and macOS clients; the Amnezia FAQ explains version compatibility.
- Save the appropriate profile on the device.
- Open the application's add-connection or import-from-file action.
- Select the
.conffile. Extract a ZIP before importing. - Alternatively, scan that profile's QR code if the client offers QR import.
- Allow the application to create a VPN connection, then enable it.
Button labels vary by application and OS. The device needs its VPN profile, not the VPS root password. Files and QR codes contain VPN access data; keep them out of public posts and chats.
Save the files promptly. Downloads in the Proksik service are available for 24 hours from job creation. This is a download window, not a VPN expiry: an already saved profile continues to work on the configured, paid-for VPS.
Step 7. Verify the IP, websites and both networks
A “Connected” indicator does not prove that the traffic you need is passing through the tunnel. Check the connection in this order:
- Before enabling the VPN, check your external IPv4 using an IP-check service.
- Enable AmneziaWG and repeat the check. This setup should use your VPS public IPv4 as the exit address.
- Open several HTTPS websites by domain name to exercise name resolution and data transfer.
- Download a small file or use a website for a while. One successful request does not establish connection stability.
- On a phone, repeat the test on Wi-Fi, then turn Wi-Fi off and test mobile data.
The current setup in the Proksik service provides IPv4 internet egress. IPv6 is also routed into the tunnel, but it does not provide IPv6 internet egress. Access to IPv6-only destinations is therefore not an expected result.
Our installer test for the 15 November 2026 release used a separate Ubuntu 22.04 virtual machine. Two profiles, HTTPS traffic and connections after a server reboot worked. This validates that installation, not mobile-carrier performance. Your device, client and networks still need their own checks.
Troubleshooting AmneziaWG connections
The profile will not import
Update to a client supporting version 3.1 from an official source. Import the extracted .conf, not the ZIP archive. Do not manually copy an AmneziaWG profile into ordinary WireGuard: the configuration parameters differ.
Wi-Fi works, but mobile data does not
Test the same profile on the same device in both networks. If the network is the only difference, check whether it permits the selected UDP traffic. Wi-Fi success does not rule out mobile-network restrictions. A different client or port may help diagnosis but is not a guaranteed fix; the port-change limitation of the Proksik service above still applies.
The client connects, but websites do not load
Check VPS internet connectivity, hosting UDP rules and the installer verification result. If an IP check works but domain names fail, investigate DNS separately. If small requests work but transfers stall, record the symptoms for route and MTU diagnosis instead of trying arbitrary values.
Two devices have an unstable connection
Make sure they are not using the same profile simultaneously. Use different files from the archive. Importing a single file under a different name does not create an independent key.
AmneziaWG or VLESS + WebSocket + TLS?
AmneziaWG has fewer setup components if you want a first VPN without a domain. Your network and supported clients still determine which option fits.
| Aspect | AmneziaWG in the Proksik service | VLESS + WebSocket + TLS in the Proksik service |
|---|---|---|
| Connection to VPS | UDP on the chosen port | TCP 443 with TLS |
| Domain and certificate | Not required | Domain and valid certificate required |
| Device configuration | .conf for a version 3.1-compatible client | Client supporting VLESS, WebSocket and TLS |
| When to test it | A domain-free VPN on a network allowing UDP | An alternative connection path, including when UDP is problematic |
| Speed and availability | Measure on your VPS and target networks. We have no controlled speed benchmark comparing these two installations. | |
This compares VLESS + WebSocket + TLS, not VLESS + REALITY. Our separate WS + TLS test on 20 October 2026 worked on Wi-Fi and mobile data; that observation cannot automatically be extended to other networks.
Current Xray documentation recommends XHTTP instead of WebSocket because of recognisable traffic characteristics. WS + TLS should therefore not be presented as universally resistant to detection either.
Frequently asked setup questions
Do I need an Amnezia subscription?
This guide uses your own VPS and its generated profiles, rather than access to a provider's ready-made VPN servers. The Proksik service configures your VPS and is not an official Amnezia product. Check the Proksik service website for its current terms.
Does the Proksik service website need to stay open?
No. Once configured, your application connects to your VPS. Keeping a browser tab with the Proksik service open is not required for traffic transfer.
Can I connect a router?
Only if its software supports AmneziaWG 3.1 and the required profile format. Having ordinary WireGuard in a router menu does not establish compatibility. This guide configures the VPS; router setup needs separate checks.
Do I need terminal experience?
The wizard performs the installation. You still need to find your server IP, verify SSH access and open the UDP port in the hosting panel. Manually assembling server keys and individual configuration parameters is not required.
Is there a Telegram option?
The Telegram bot for the Proksik service also offers setup. This guide shows the browser wizard; the overall flow remains server details, a plan, installation confirmation and profiles.
Open the AmneziaWG wizard to start configuring your server. For the other services, read our review of the Proksik service.