Building your own mobile proxy pool on Windows not only saves money compared to renting ready-made solutions, but also gives you full control over the infrastructure: you choose the carriers, regions, and data plans yourself. This approach is especially popular for web scraping, traffic arbitrage, and automation tasks that require clean, "unspoiled" IP addresses. In this article, we'll walk through how to deploy multiple independent proxy channels on a single Windows PC using Huawei 4G modems and the 3proxy server.
A single computer running Windows 7 or Windows 10 can support up to 15 simultaneously connected USB modems — that's how many ports the operating system can reliably recognize as separate network interfaces. If you need more channels, simply add a second PC and repeat the setup.
What you'll need for the build
- A computer running Windows 7 or Windows 10 (32 or 64 bit)
- Huawei E3372h 4G modems or, if on a tight budget, Huawei E3531 3G modems
- A powered USB hub with an external power supply (not powered from the computer's USB port)
- SIM cards with active mobile internet plans
- A router with a wired internet connection and a static IP (for port forwarding to the external network)
The key requirement for the modems is that they must have a modified firmware installed that allows changing the DHCP gateway IP address through the device's web interface. Without this capability, it will be impossible to assign different subnets to multiple modems.
Check for the DHCP gateway change feature first. If your firmware doesn't have it — find and install a modified firmware version for the Huawei E3372h.
We also recommend using USB extension cables 0.5–1 meter long to space the modems apart from each other: this reduces heat buildup and minimizes radio interference between antennas.
Step 1. Modem configuration — assigning unique IP addresses
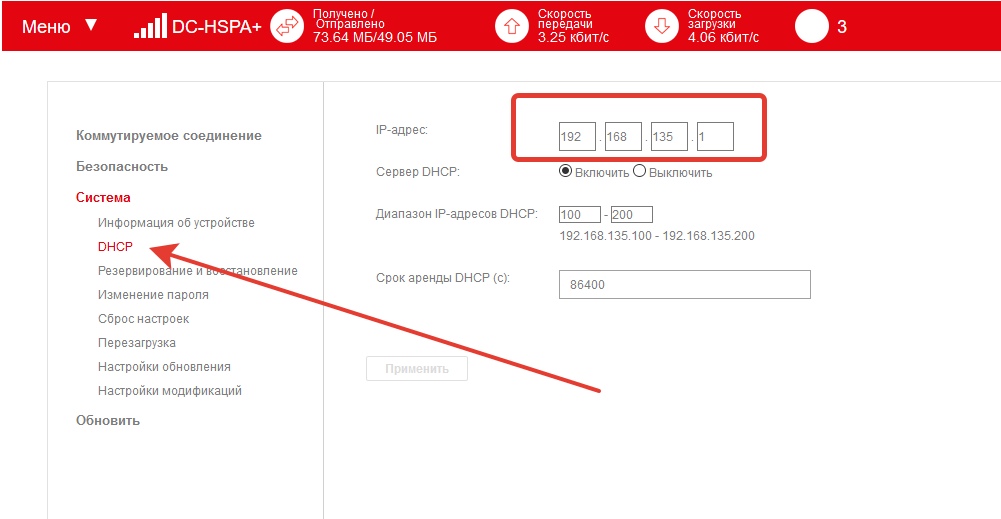
Connect the modems to the computer one at a time. For each modem, open its web interface (usually at 192.168.8.1) and go to Settings → System → DHCP to change the gateway IP address.
The addressing scheme can be anything, as long as the subnets don't overlap:
- Modem 1: gateway 192.168.2.1
- Modem 2: gateway 192.168.3.1
- Modem 3: gateway 192.168.4.1
- …and so on in ascending order
After configuration, label the modems with a marker or stickers — this will save time when troubleshooting later.
Step 2. Connecting all modems and verifying network interfaces
Connect all configured modems through the USB hub. Windows will recognize each of them as a separate NDIS network adapter — they will appear in Network Connections as Ethernet interfaces.
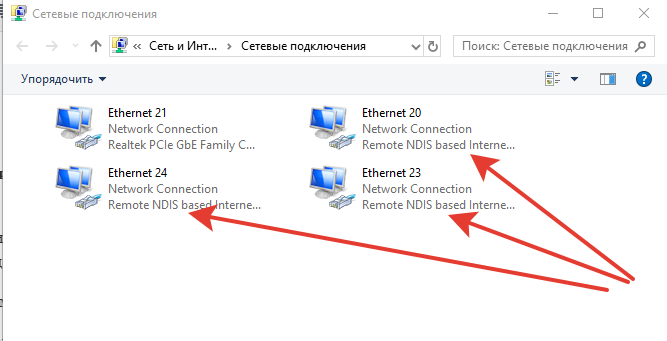
Example of how the connections list looks with three modems:
- Ethernet 21 — main wired connection, local IP 192.168.88.3
- Ethernet 20 — first modem, gateway 192.168.2.1
- Ethernet 23 — second modem, gateway 192.168.3.1
- Ethernet 24 — third modem, gateway 192.168.4.1
Step 3. Configuring the main connection and route metrics
After connecting the modems, it's important to make sure that the computer's own traffic goes through the main wired connection, not through one of the modems. Open any IP checking website — if it shows an address from a SIM card, you need to fix the route priority.
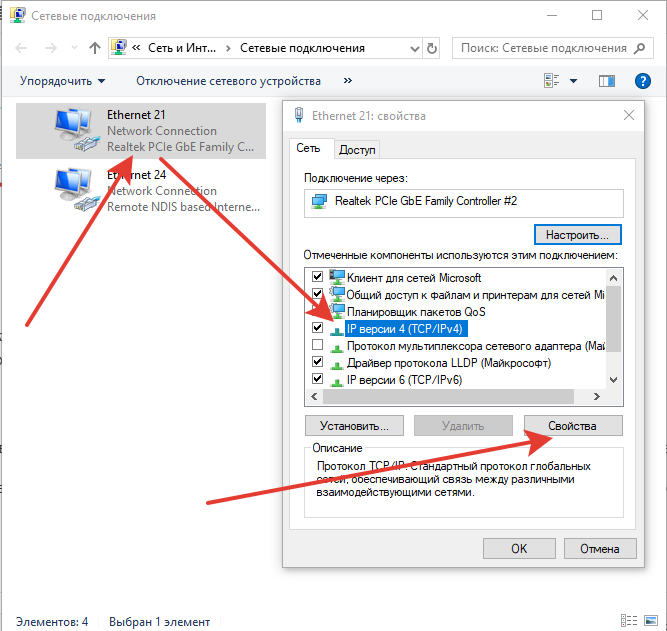
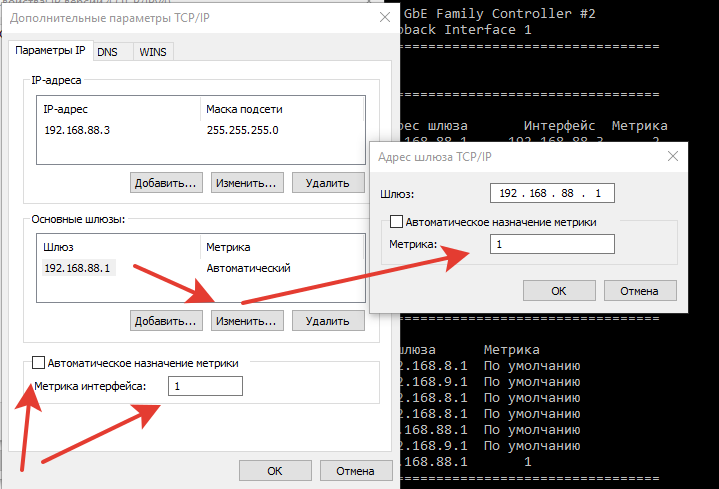
Open the properties of the main Ethernet interface (right-click → Properties → Internet Protocol Version 4 → Properties). Set a static local IP for the computer, for example:
- IP address: 192.168.88.3
- Subnet mask: 255.255.255.0
- Default gateway and DNS: 192.168.88.1 (your router's IP)
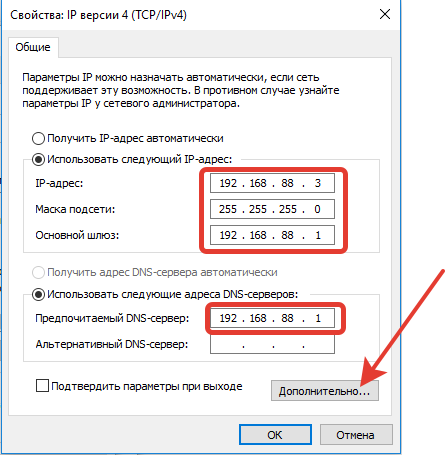
Then click Advanced and in the Interface metric field set the minimum value (for example, 1). This ensures the system will prefer the main route when selecting the default gateway.
After saving the settings, check your IP on an external service again — it should show the router's ISP address. If the changes haven't taken effect, restart the computer.
Step 4. Installing and configuring 3proxy on Windows
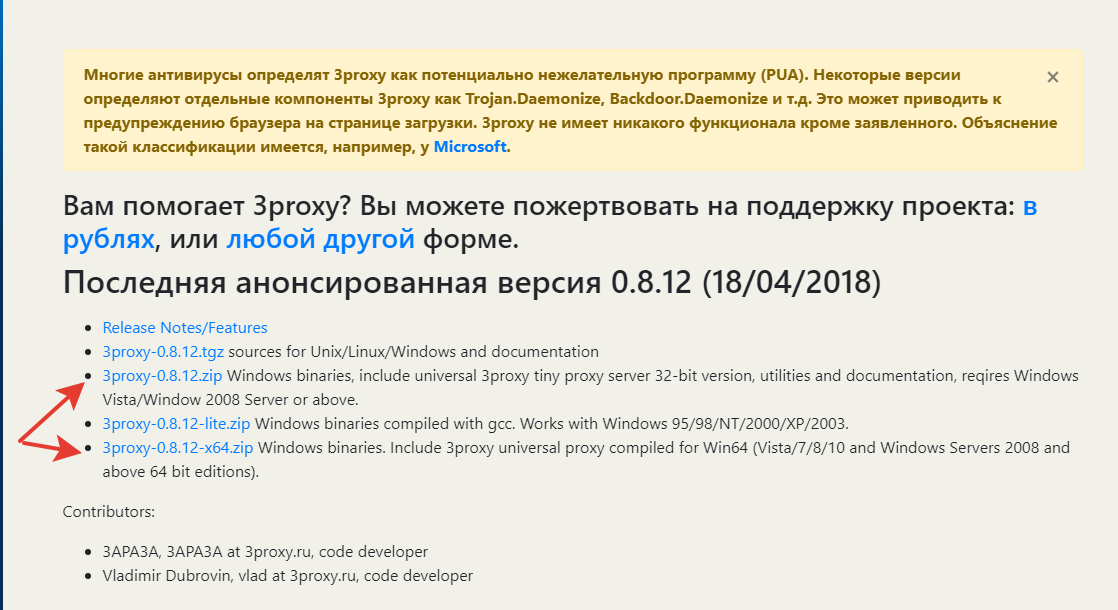
Download the latest stable release of 3proxy from the official website 3proxy.ru or from GitHub (version 0.9.6). Choose the version matching your operating system's architecture: win32 for 32-bit, win64 for 64-bit.
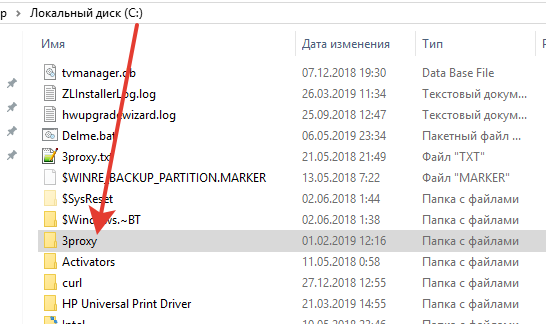
Extract the archive to the root of drive C: and rename the folder to 3proxy. The resulting path to the executable will be:
- 64-bit version:
C:3proxyin643proxy.exe - 32-bit version:
C:3proxyin3proxy.exe
In the bin64 folder (or bin for 32-bit), create a text file named 3proxy.txt — this is the proxy server configuration file. Paste the following content into it:
monitor C:3proxyin643proxy.txt
maxconn 500
nscache 65536
timeouts 1 5 30 60 180 1800 15 60
#log C:3proxylog3proxy.log D
#logformat "- +_L%t.%. %N.%p %E %U %C:%c %R:%r %O %I %h %T"
#rotate 180
auth strong
users login1:CL:pass1
allow login1
proxy -n -a -p8062 -i192.168.88.3 -e192.168.2.100
proxy -n -a -p8063 -i192.168.88.3 -e192.168.3.100
proxy -n -a -p8064 -i192.168.88.3 -e192.168.4.100
flush
Explanation of configuration parameters:
192.168.88.3— static local IP of the computer (the interface that accepts incoming connections)192.168.2.100— IP of the first modem (outgoing traffic for the first proxy goes through it)192.168.3.100— IP of the second modem192.168.4.100— IP of the third modem-p8062,-p8063,-p8064— ports each proxy listens onlogin1/pass1— username and password (the username must appear in two places: in theusersdirective and in theallowdirective)
The logging lines are commented out with #. If you plan to provide the proxy to third parties — create the folder C:3proxylog and remove the # symbols before those lines.
Note: the path in the first monitor line must match the actual location of the config file. For the 32-bit version, replace bin64 with bin.
Step 5. Running 3proxy as a Windows system service
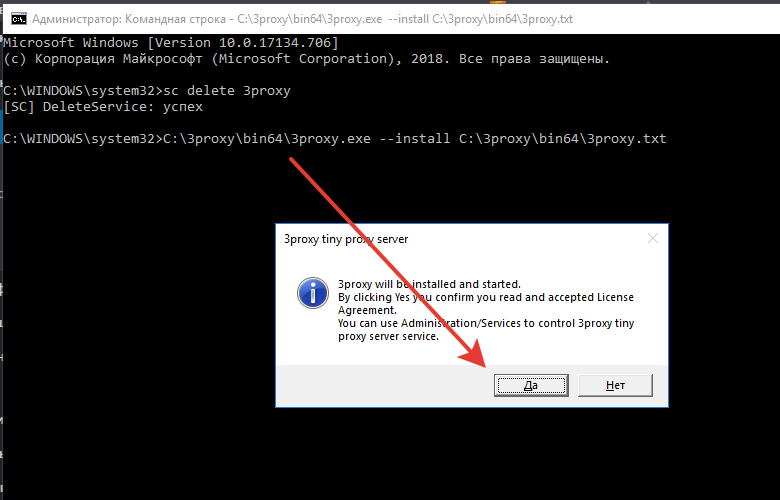
Open a command prompt with administrator privileges (Win + R → cmd → Ctrl+Shift+Enter) and run the service installation command.
For the 64-bit version:
C:3proxyin643proxy.exe --install C:3proxyin643proxy.txt
For the 32-bit version:
C:3proxyin3proxy.exe --install C:3proxyin3proxy.txt
After successful installation, the service will start automatically and will launch together with Windows.
Step 6. Testing proxy connectivity
The ready proxies with connection parameters look as follows:
192.168.88.3:8062:login1:pass1
192.168.88.3:8063:login1:pass1
192.168.88.3:8064:login1:pass1
To verify internet connectivity through each modem, use the ping command with a specified outgoing interface. Open a command prompt and run the following one by one:
ping -S 192.168.2.100 vk.com
ping -S 192.168.3.100 vk.com
ping -S 192.168.4.100 vk.com
If the pings are successful — the modem is connected to the network and outgoing traffic through it is working. If there are no responses, check: the SIM card's data plan, signal strength, and the connection profile in the modem's settings.
Step 7. Opening ports in the Windows firewall
By default, Windows Firewall blocks incoming connections on non-standard ports. To make the proxies accessible from other devices on the local network, create an allow rule.
Open Windows Firewall → Advanced Settings → Inbound Rules → New Rule.

Select the rule type Port, protocol TCP, and specify your port range (for example, 8062-8064).
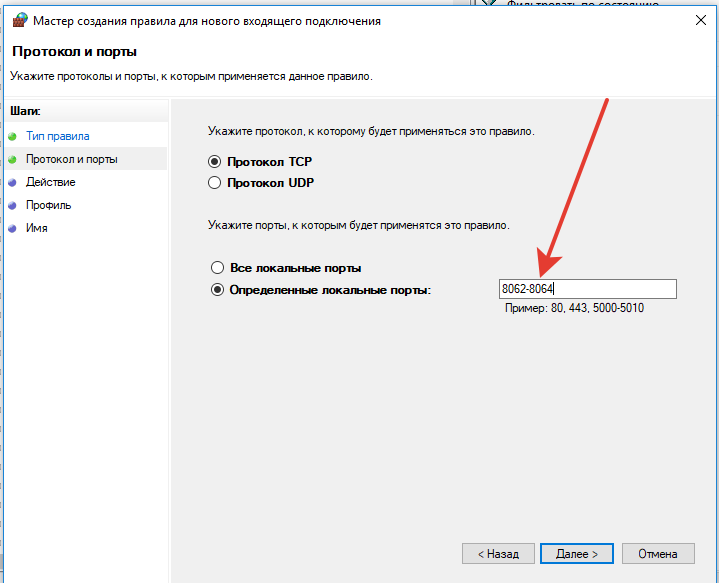
Click Next through to the last step and give the rule any name, for example "3proxy". After that, the proxies will be accessible to devices on the same local network.
To access the proxies from the internet, configure port forwarding on your router. The setup procedure depends on your router model — refer to the device documentation.
Step 8. Automatic IP address rotation
The mobile IP changes when the modem reconnects to the carrier's network. To automate this process on a schedule, specialized software is used — MasterModems.
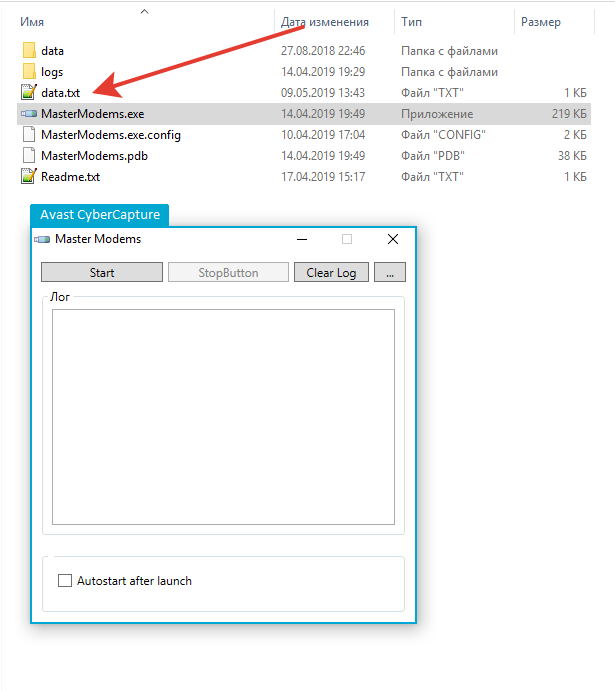
The program works through a configuration file called data.txt, where each line describes one modem. The record format is:
IP{TAB}3G/4G{TAB}Reconnect timeout (minutes)

Where:
- IP — the modem's gateway address (for example, 192.168.2.1)
- 3G/4G — the modem's operating mode
- Reconnect timeout — the IP rotation interval in minutes
When a homemade proxy isn't enough
A DIY farm of USB modems gives you freedom, but requires constant maintenance: monitoring signal strength, replacing SIM cards, rebooting frozen modems, and keeping Windows stable. If you need reliability without operational overhead — it's easier to rent ready-made mobile proxies.
Frigate Proxy provides mobile proxies on SIM cards from Russian carriers with IP rotation, high uptime, and a ready-to-use API for management. No modems, no firmware, no command lines — just working proxies from the very first minute.